Introduction
Filling out your SSC (Staff Selection Commission) online application form correctly is the crucial first step toward appearing in any SSC exam — CGL, CHSL, MTS, GD Constable, JE, Stenographer, and more. A single mistake in your form — a wrong document format, mismatched details, or a missed fee payment — can lead to application rejection, costing you an entire exam cycle. This guide walks through exactly how to fill the SSC online form 2026 step by step, covering the One-Time Registration (OTR) system, document specifications, and the most common mistakes to avoid.
SSC has moved to a centralised One-Time Registration system, meaning most of your registration work is a one-time effort that carries forward across future SSC exams — understanding this system properly saves significant time for every subsequent SSC application you make.
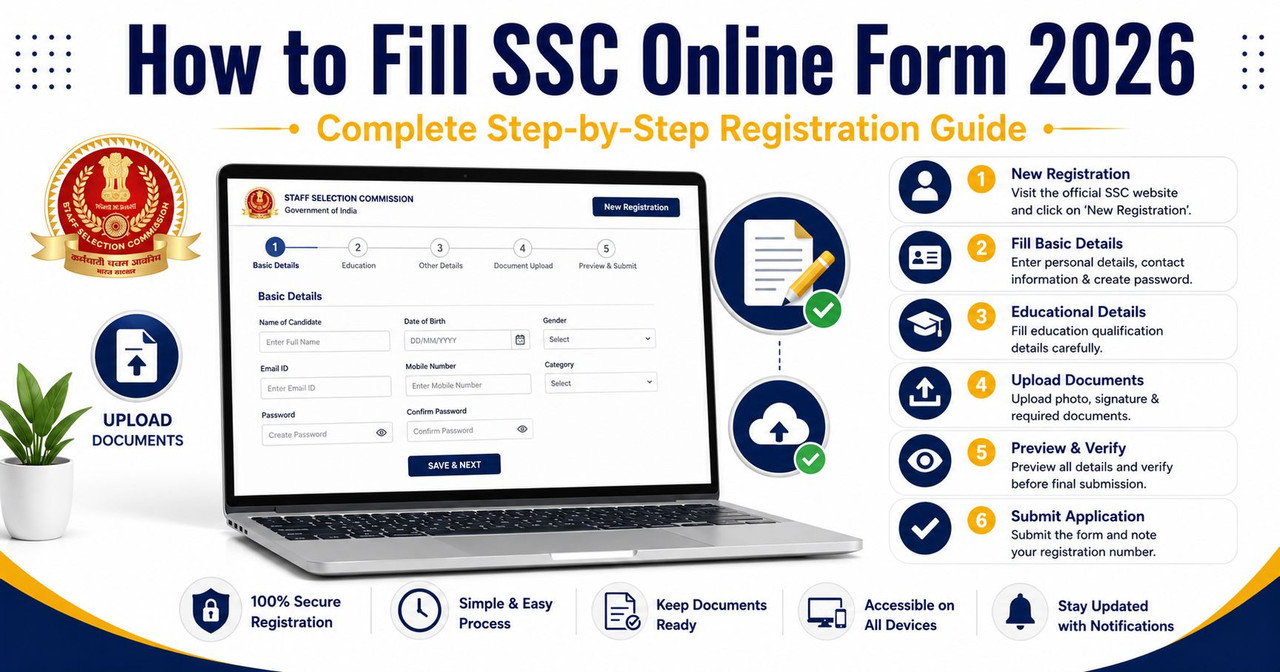
Step 1: Complete SSC One-Time Registration (OTR)
Before applying for any specific SSC exam, you must first complete registration on the SSC OTR portal:
- Visit the official SSC website at ssc.gov.in
- Click on "Register Now" under the OTR (One-Time Registration) section
- Fill in your basic personal details — name (exactly as per Class 10 certificate), date of birth, gender, mobile number, and email ID
- Verify your mobile number and email ID through the OTP sent to each
- Complete the detailed registration form with additional personal, educational, and category details
- Upload your photograph and signature as per SSC's specified format
- Submit the OTR form — you will receive a Registration ID, which you'll use for all future SSC applications
Important: Your OTR registration, once completed, generally does not need to be repeated for future SSC exams — you simply log in with your existing Registration ID and apply for the specific exam.
Step 2: Log In and Apply for the Specific SSC Exam
- Once OTR is complete, log in to your SSC account using your Registration ID and password
- Locate the specific exam notification you wish to apply for (e.g., SSC CGL 2026, SSC CHSL 2026) under the "Apply" section
- Click "Apply" against the relevant exam notification
Step 3: Fill the Exam-Specific Application Form
- Confirm and, if needed, update your basic details carried over from OTR
- Select your preferred exam centres (SSC typically allows you to choose in order of preference)
- Fill in post preferences, where applicable (some SSC exams, like CGL, allow candidates to rank preferred posts)
- Enter your educational qualification details accurately, matching your certificates exactly
- Select your category (General/OBC/SC/ST/EWS/PwBD) and upload the relevant certificate if applicable
Step 4: Upload Required Documents
SSC specifies exact size and format requirements for uploads — typically:
- Photograph: Recent passport-size photo, JPG format, within specified KB size range (commonly 20KB-50KB)
- Signature: Clear signature on white paper, scanned, JPG format, within specified KB size range
- Category Certificate (if applicable): PDF format, within specified size limits
Always check the exact current specifications in your specific exam's notification, as SSC occasionally revises size/format requirements between cycles.
Step 5: Preview and Verify Your Application
Before final submission, use SSC's "Preview" option to check every field carefully:
- Name spelling matches your Class 10 certificate exactly
- Date of birth matches official records
- Category and sub-category selections are correct
- Photograph and signature display clearly and correctly
Step 6: Pay the Application Fee
- Select your preferred payment mode — Net Banking, Debit Card, Credit Card, or UPI
- Complete the payment and wait for the confirmation/receipt page to load fully — do not close the browser mid-transaction
- Download and save the fee payment receipt for your records
Note: SC/ST, PwBD, and Ex-Servicemen candidates, along with women candidates for certain SSC exams, are generally exempted from the application fee — check the specific exam notification for exact fee exemption categories.
Step 7: Submit and Download Confirmation
- Once fee payment is confirmed, complete the final submission
- Download and print your application confirmation page/registration slip
- Retain this confirmation along with your fee receipt for future reference, including at the admit card and document verification stages
Common Mistakes That Lead to SSC Form Rejection
- Name/DOB mismatch: Your name and date of birth must match your Class 10 certificate exactly — even minor spelling differences can cause issues later during document verification
- Incorrect photo/signature specifications: Uploads that don't match SSC's exact size and format requirements are among the most common rejection reasons
- Selecting the wrong category: Incorrectly claiming a reserved category without valid supporting documentation can lead to disqualification at the verification stage
- Not previewing before submission: Many errors go unnoticed simply because candidates rush through the final submission without using the Preview option
- Missing the fee payment window: Completing registration but failing to pay the fee before the deadline results in an incomplete application that will not be considered
- Multiple registrations under different details: Creating more than one OTR profile with inconsistent details can cause serious complications — always use a single, consistent OTR profile for all your SSC applications
Get Instant Government Job Alerts
Never miss a notification, admit card, or result. Join our free channels for daily sarkari naukri updates delivered straight to your phone:
- 💬 WhatsApp Channel: Join Now
- 📢 Telegram Channel: Join @govtjobsiojobs


Leave a Reply
Be the first to comment.